
Table of Contents: Anthurium Crystallinum

Plant Overview
The crystal anthurium displays stunning, heart-shaped velvety leaves crossed with brilliant, luminous white veins that shimmer like fine minerals. The compact, upright growth habit showcases wide, dark green foliage that introduces a luxurious jungle texture into residential rooms. Cultural heritage plays a significant role in how indigenous communities traditionally utilized related species within local landscapes and daily rituals. This exotic specimen serves as a fantastic choice for collectors who appreciate tactile foliage and dramatic contrast. Its inherent biological adaptation allows it to flourish indoors when shielded from extreme environmental swings.

The plant originates in tropical rainforest understories where its epiphytic nature evolved to anchor onto tree trunks in filtered canopy light. This native adaptation shapes its structural versatility, allowing it to function as a dramatic tabletop statement piece or a terrarium feature in modern interior spaces. The introduction integrates historical context seamlessly into contemporary home decor trends.
Quick Facts
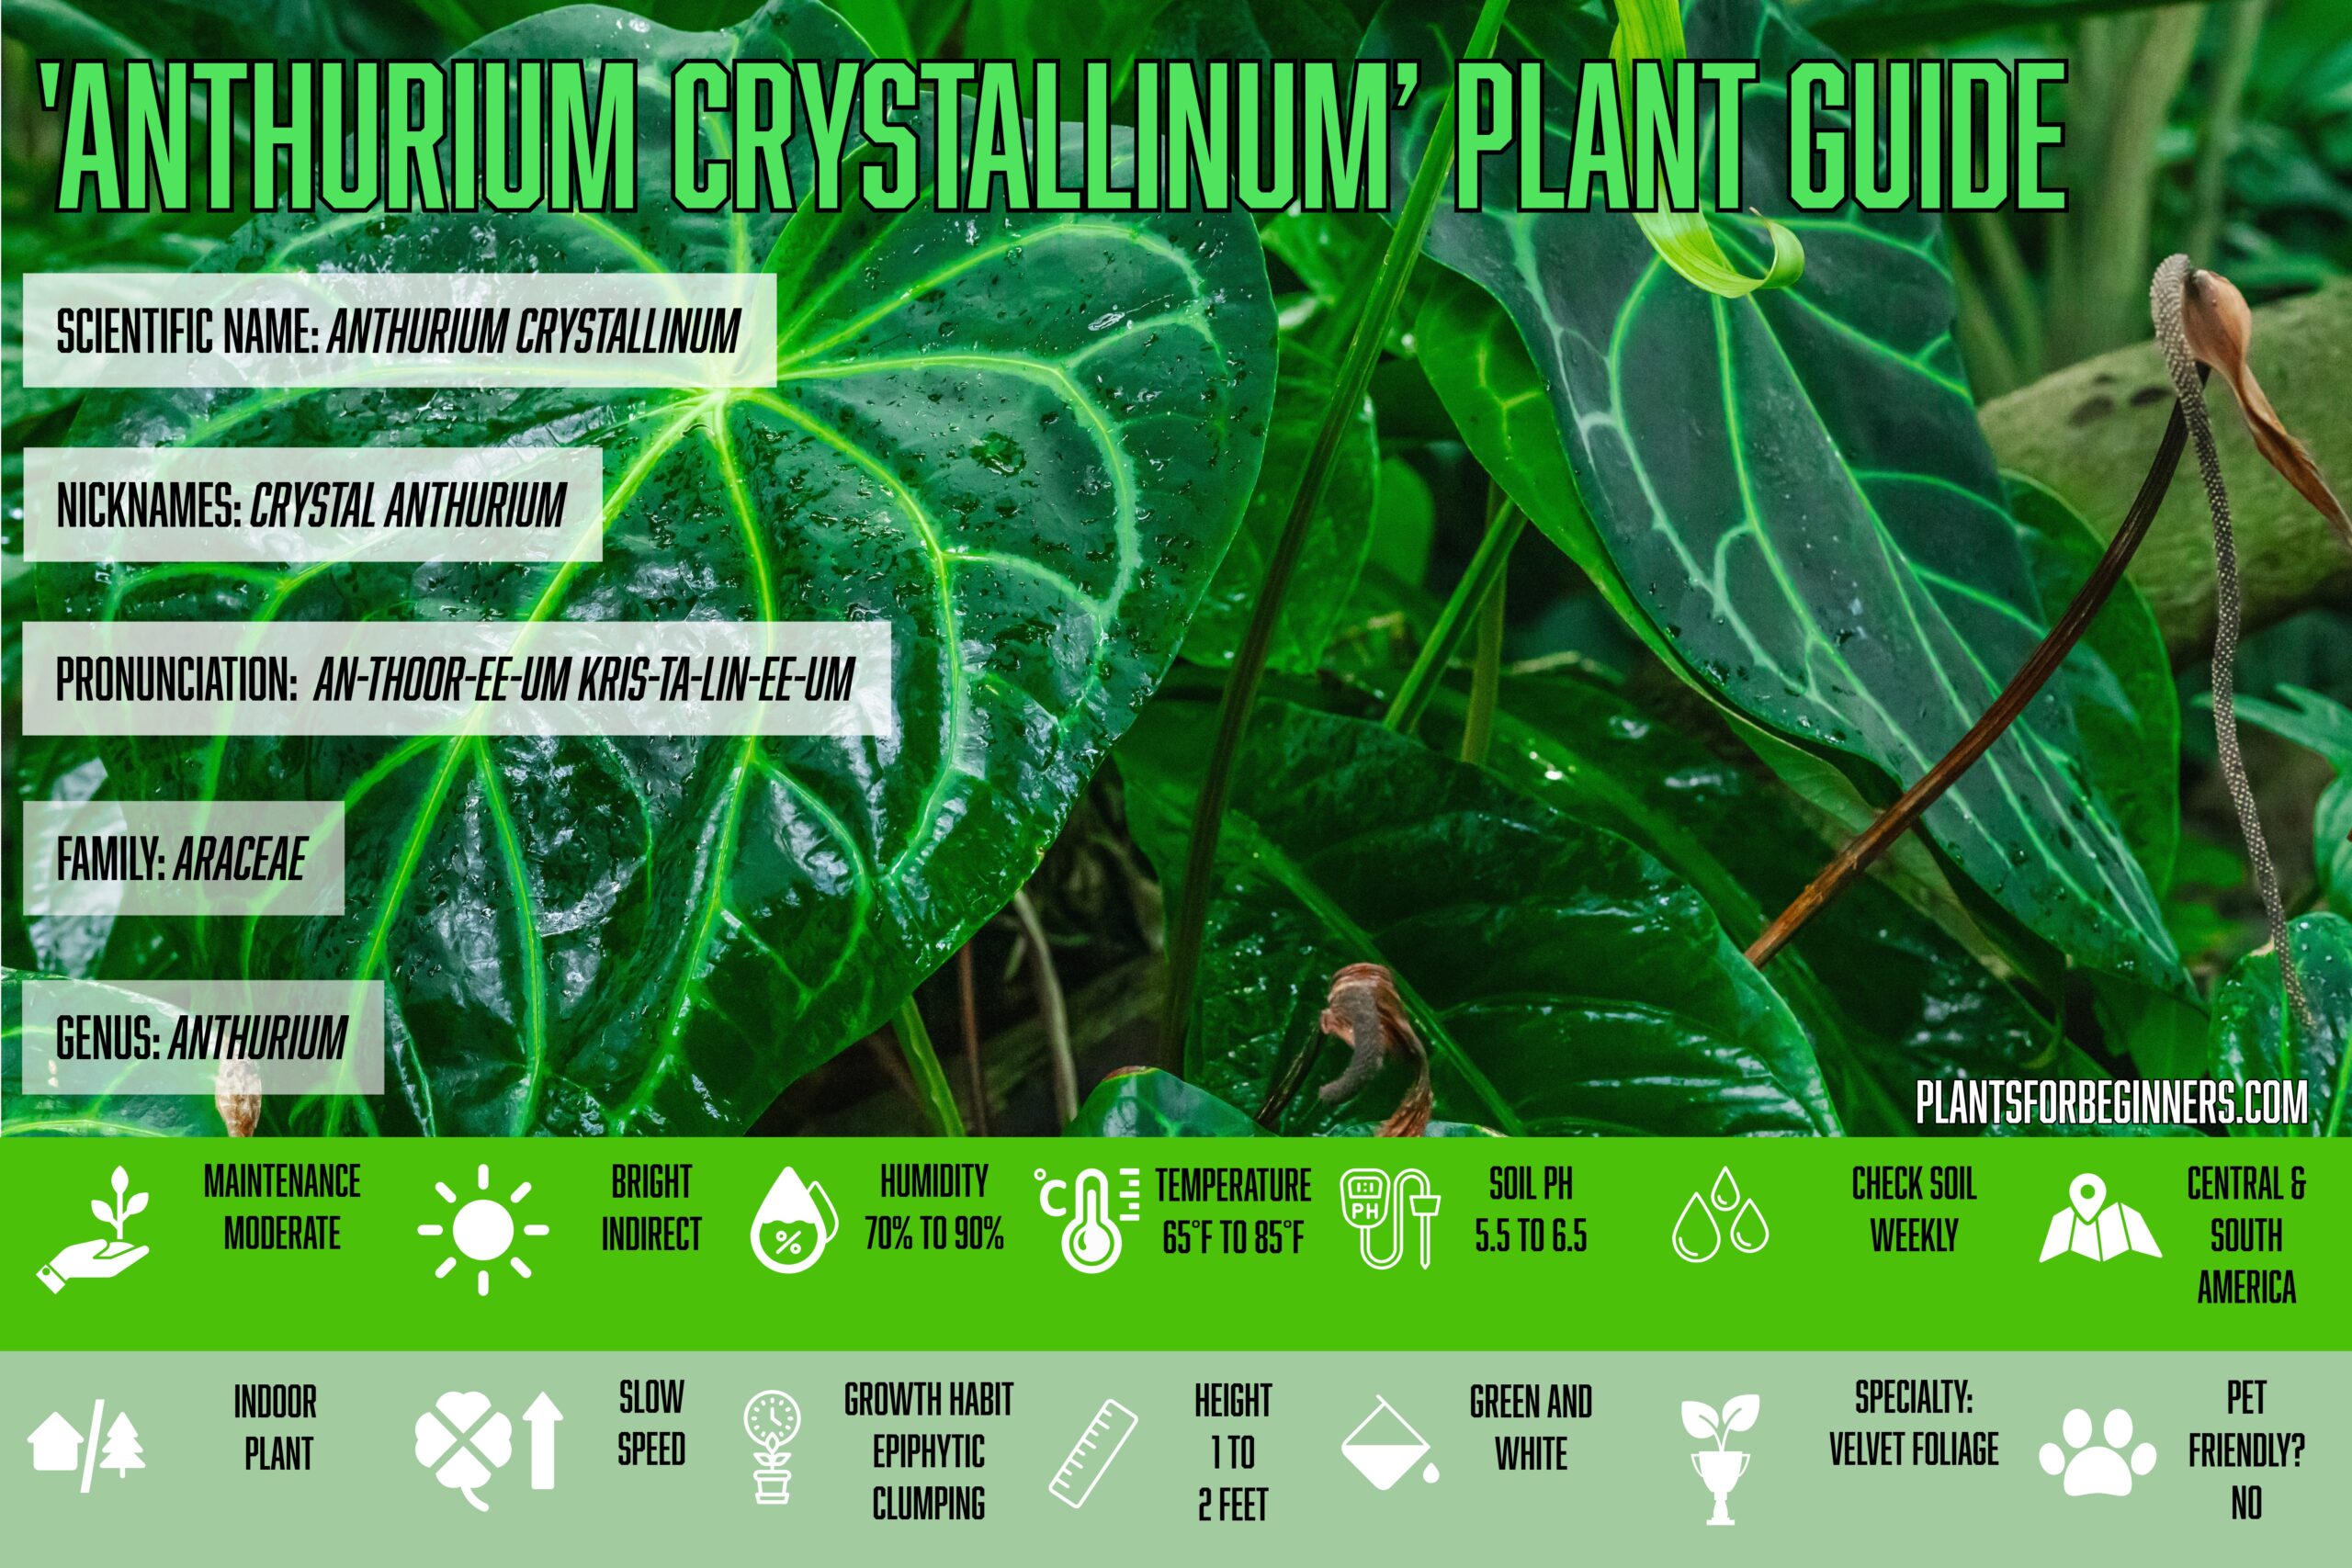
| Plant Metric | Profile Data |
| Binomial Plant Name | Anthurium crystallinum (Crystal Anthurium) |
| Type | Foliage Houseplant |
| Genus | Anthurium |
| Pronunciation | an-THOOR-ee-um |
| Meaning Behind Name | The name combines Greek words meaning flower and tail, referring to the spadix structure. |
| Nicknames | Crystal Anthurium, Velvet Leaf Anthurium |
| Commonly Confused With | Anthurium clarinervium, which features similar silver veining but shorter, more rounded leaf lobes. |
| Variants of Plant | Anthurium crystallinum ‘Silver Blush’, Anthurium crystallinum x magnificum |
| Temperature | 65°F to 85°F (18°C to 29°C) |
| Light | Bright, indirect light to protect velvety leaf cells |
| Watering | Allow top two inches of soil to dry slightly |
| Humidity | 70% to 90% ambient relative humidity |
| Soil pH | 5.5 to 6.5 |
| Blooming Season | Rarely blooms indoors |
| Lifespan | 5 to 10 years or more with proper care |
| Growth Speed | Slow rate producing a few new leaves annually |
| Pet Friendly | No (Toxic containing calcium oxalate crystals) |
Native Climate & Indoor Placement
The evolutionary background of the crystal anthurium is deeply rooted in the warm, humid understories of Central and South American rainforests where dappled sunlight filters through dense canopies. This natural setting taught the plant to utilize bright, indirect light efficiently, setting up exactly why placement is critical to prevent foliage damage or stress. Proper placement ensures that the delicate velvet texture receives adequate energy without suffering from harsh sunburn or fading due to extreme darkness.

Window Orientation: East-facing or bright north-facing windows provide the ideal exposure without scorching the sensitive velvet leaf surfaces.
Deep Room Placement: The container can reside up to five feet away from a bright light source if supplemented by a dedicated grow light.
Temperature Ranges: Active seasonal household growth thrives consistently between 65°F and 85°F (18°C to 29°C).
Winter Minimums: The absolute baseline temperature threshold is 60°F (15°C) before cellular frost damage occurs.
Draft Warnings: Avoid household locations near heating vents, air conditioning paths, or drafty entryways.
Care & Seasonal Maintenance
Hydration for this species relies entirely on a unique metabolic clock that fluctuates depending on ambient indoor temperatures and light exposure. Fixed calendar watering routines fail because the physical tissue cells of the leaves process moisture based on active transpiration rates rather than arbitrary schedules. Monitoring the actual soil dryness prevents overwatering and ensures the root system maintains optimal oxygen levels.
Deep, structural drenches mirror natural tropical downpours and prompt the plant to establish resilient, localized root networks. Pour water thoroughly through the potting medium until it drains freely from the bottom holes, then discard any excess liquid collected in the saucer. This practice flushes out accumulated mineral salts and refreshes the root zone completely.

Lighting Thresholds for Anthurium Crystallinum
Healthy foliage displays vibrant, high-contrast dark green leaves and glowing white veins under optimal bright, indirect light conditions. Light starvation causes the striking venation to fade as the plant attempts to compensate for reduced energy absorption. Conversely, extreme midday sun scorching creates crisp, brown patches across the delicate velvet leaf tissue.
Seasonal Adjustments for Anthurium Crystallinum
- Spring and Summer (Active Growth): Water thoroughly whenever the top two inches of soil feel dry, and apply a balanced liquid houseplant fertilizer diluted to half-strength every four weeks.
- Autumn and Winter (Dormancy): Reduce watering frequency as ambient light contracts, and halt all fertilization completely until spring returns.
Step-by-Step Repotting Guide
The root network of this epiphytic grower expands slowly, typically requiring a container upgrade every twenty-four to thirty-six months during early spring. Restraint is required when choosing to disturb the plant because frequent container adjustments can stall or shock leaf production. Allowing the roots to become slightly settled before moving up one pot size encourages stronger structural development.
Epiphytic Soil Mix Matrix for Anthurium Crystallinum
Standard heavy potting dirt suffocates this specific plant’s roots by retaining too much moisture, so a custom aerated mix is essential:
- Ratio Part 1: Orchid bark acts as the primary chunky base and anti-compaction agent.
- Ratio Part 2: Perlite provides essential drainage and structural aeration for delicate roots.
- Ratio Part 3: Sphagnum moss introduces natural moisture retention and organic nutrients.

How to Repot Your Anthurium Crystallinum
Early spring represents the best calendar season to handle repotting to maximize seasonal recovery windows.
- Select a container that is one size larger than the current pot, ensuring it features adequate drainage holes, and gently slide the root ball out of its existing vessel.
- Tease apart tightly wound root strands with your fingers and gently comb away old, compacted substrate to encourage new root branching.
- Inspect the root system carefully, using sterilized shears to trim away any dead or mushy tissue before preparing the base structural alignment.
- Add a fresh layer of the custom tropical soil mix to the bottom of the new pot, center the plant, and fill the side cavities safely without compacting air pockets.
- Provide post-repot baseline care by watering lightly to settle the soil, placing the plant in a recovery zone with high humidity, and pausing all fertilization for six weeks.
Step-by-Step Propagation Guide
This species propagates through division or specialized stem cuttings because its clumping growth habit generates distinct basal offsets over time. Standard multiplication paths require patience due to the slow-growing nature of the root network. Utilizing these natural growth structures allows growers to build new independent plants from established clumps safely.
Method 1: Division (Fastest Results)
Dividing mature clumps provides a reliable way to multiply your collection while keeping the main plant healthy and compact.
- Gently remove the mature plant from its container and brush away excess soil to expose the natural separation points between basal offsets.
- Carefully tease apart the intertwined root strands, using sterilized shears to separate individual growth points with attached roots.
- Select small nursery containers filled with a light epiphytic propagation mix consisting of orchid bark, perlite, and peat.
- Plant each division securely at the same depth it grew previously, apply initial moisture, and locate the containers in a warm micro-climate with bright indirect light.
- Track root recovery by monitoring new leaf emergence after four to six weeks to confirm independent establishment.

Method 2: Stem Cuttings (The Patient Approach)
Stem cutting propagation offers an alternative method for multiplying older specimens that have developed visible aerial stems.
- Isolate a healthy stem section that includes at least one visible node and aerial root, making a clean cut with sterilized shears.
- Allow the cut end to air-dry and callus over for a few hours to prevent bacterial rot during initial rooting.
- Place the cutting horizontally into a propagation tray filled with moist sphagnum moss or perlite.
- Maintain high humidity levels by covering the container with a clear humidity dome while providing bright, indirect light.
- Monitor the node weekly until new shoots emerge, then transplant the rooted section into a standard epiphytic soil mix.
Identification & Treatment of Common Pests
Physical makeup displays stress quickly through color shifts and leaf texture changes that act as early warning signals. Decoding these visual alerts early acts as an emergency firewall protecting the subterranean roots and central core from long-term collapse. Maintaining clean foliage and proper ambient airflow prevents most common indoor infestations before they multiply.
Syngonium Aurea: Visual Symptom Table
| What You See | The Underlying Issue | The Instant Fix |
| Crispy leaf edges | Low ambient relative humidity | Group plants together or run a cool-mist humidifier nearby |
| Yellow lower foliage | Overwatering or compacted soil | Allow soil to dry out completely and improve drainage |
| Pale, washed-out leaves | Excessive direct sunlight | Move the container back into shaded, indirect light |
| Brown, mushy stems | Root rot from standing water | Trim affected roots and repot into fresh dry soil |
| Sticky residue on leaves | Pest infestation (scale or aphids) | Wipe leaves down thoroughly with insecticidal soap |

Identification & Treatment of Key Pests
Regular foliage maintenance patterns ensure early insect mitigation, and low-impact organic controls protect delicate leaf surfaces from chemical damage.
Spider Mites: These tiny arachnids thrive in warm, dry indoor conditions, spinning fine webs and draining individual leaf cells to cause stippling.
- The Fix: Wash the foliage thoroughly under lukewarm water and apply organic neem oil spray to all leaf surfaces every seven days.
Scale Insects: These stationary pests anchor along stems and leaf veins, secreting sticky honeydew while draining vital plant sap.
- The Fix: Apply 70% isopropyl rubbing alcohol directly to individual scales using a cotton swab to dissolve their protective outer shells.
Mealybugs: These cottony white insects nest within tight node layers and leaf joints, stunting seasonal growth spikes.
- The Fix: Wipe down all nesting crevices using a cloth dampened with a mild insecticidal soap solution.
Recommended Tools & Gear
Standard household cutting tools or generic planting soils crush or damage this delicate species, making specialized accessories essential for long-term health. Investing in durable, targeted accessories ensures smooth pruning wounds and fast healing timelines across your entire collection.
- Precision Pruning Shears: The sharp stainless steel blades operate smoothly, protecting the plant from bruising or branch dieback during trimming sessions.
- Chunky Orchid Bark Aggregate: This specialized soil mix ingredient avoids compaction and guarantees continuous oxygen pathways to the root cells.
- Ceramic Self-Watering Pot: The structural asset features reliable drainage benefits and a stable weight profile that supports heavy climbing vines.
- Digital Soil Moisture Meter: This technical measurement asset removes user guesswork by verifying exact interior soil column moisture deep down.

Frequently Asked Questions: Anthurium Crystallinum
Inconsistent watering schedules or low humidity levels cause the sensitive velvet edges to dry out and yellow. Ensure your potting medium remains evenly moist and maintain high ambient humidity around the plant.
Yes, you can place it outdoors in a fully shaded patio location during warm weather. Ensure temperatures remain consistently above 65°F and bring the plant indoors well before autumn night temperatures drop.
Gently brush dust off using a soft-bristled makeup brush or wipe carefully with a damp microfiber cloth. Avoid using commercial leaf shine oils because they damage the delicate velvet texture and clog breathing pores.
No, this plant is toxic to household pets. According to the ASPCA database, ingestion of any plant part leads to intense oral irritation, drooling, and difficulty swallowing due to calcium oxalate crystals.
Citations and References: Anthurium Crystallinium
Expand
- Royal Botanic Gardens Kew: Complete taxonomic tracking, geographical documentation, and distribution updates are officially verified by the Royal Botanic Gardens, Kew Plants of the World Online Database.
- University of Florida Extension: Temperature parameters, environmental thresholds, and growth adjustment guidelines are certified by the University of Florida Extension horticultural publications.
- Missouri Botanical Garden: Indoor pest management sequences, lifecycle tracking, and diagnostic workflows are supported by the Missouri Botanical Garden plant care center.
- ASPCA Animal Poison Control Center: Animal safety classifications and toxicology logs validating pet consumption risk levels are certified via the ASPCA Toxic and Non-Toxic Plants Database.